CRA Installation
React create-react-app
The create-react-app is an excellent tool for beginners, which allows you to create and run React project very quickly. It does not take any configuration manually. This tool is wrapping all of the required dependencies like Webpack, Babel for React project itself and then you need to focus on writing React code only. This tool sets up the development environment, provides an excellent developer experience, and optimizes the app for production.
There are lots of goodies that come out of the box. We can also easily add more support for things like Sass or TypeScript.
We can run a single command and get a brand new React application that comes with:
- A recommended starting folder structure
- A solid build setup with webpack and Babel (that you don't have to worry about setting up)
- Scripts to run our React application
- Extensibility
- And more!
Requirements
The Create React App is maintained by Facebook and can works on any platform, for example, macOS, Windows, Linux, etc. To create a React Project using create-react-app, you need to have installed the following things in your system.
- Node version >= 8.10
- NPM version >= 5.6
Installing create-react-app
There are many ways to install create-react-app. Use whichever works best for your team and environment:
# using npx (npm 5.2+)
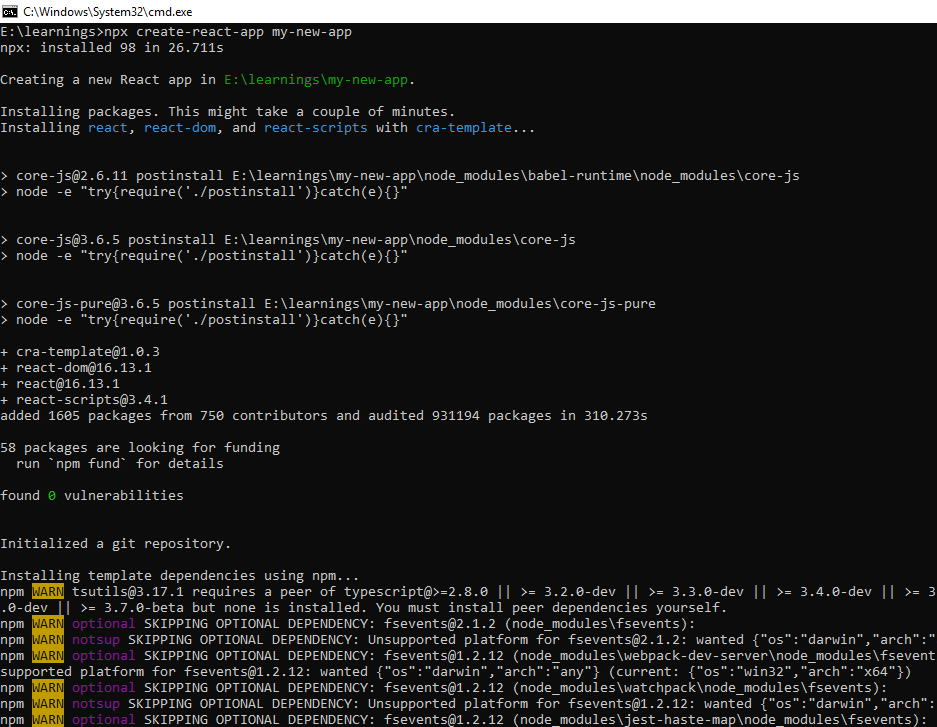
$ npx create-react-app my-new-app

# using npm (npm 6+)
$ npm init react-app my-new-app

# using yarn (yarn 0.25+)
$ yarn create react-app my-new-app
Create a new React project
We’ll use npx to create a new project:
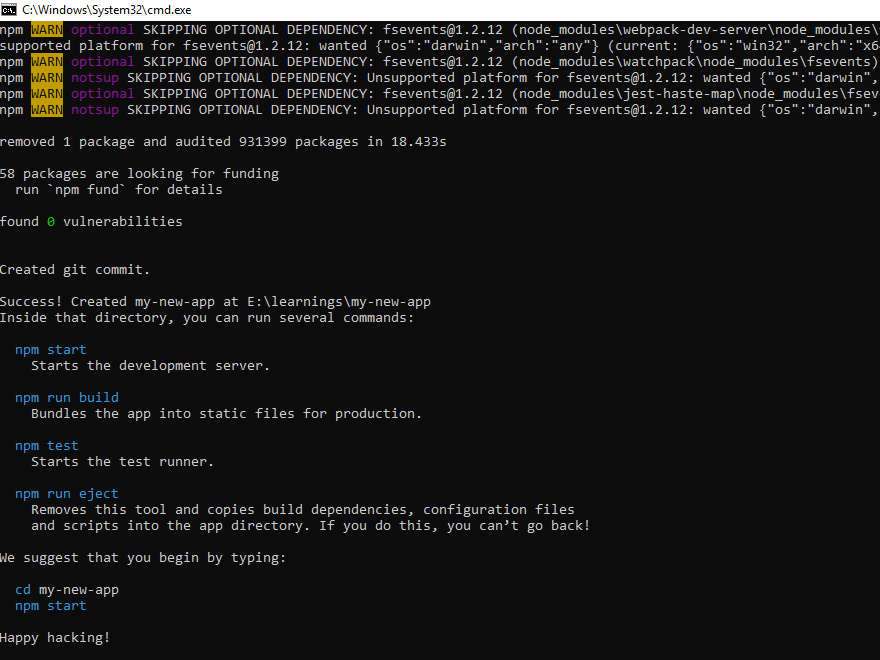
Once the React installation is successful, we can create a new React project using create-react-app command.


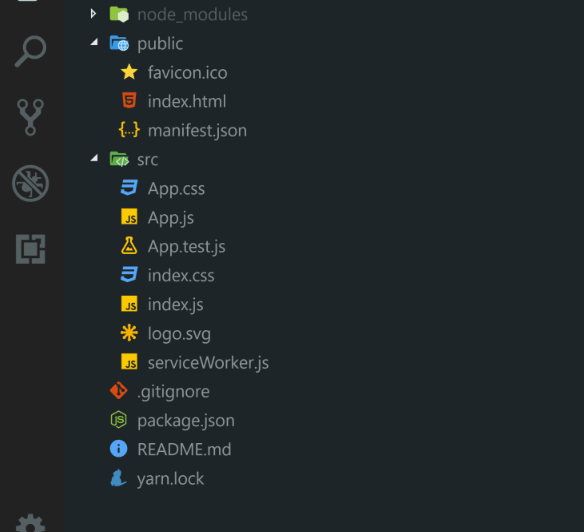
This is the new folder structure we’ll see:

Starting our React App
To start developing on our React app, we can tell the CLI to run everything and open our app in the browser at http://localhost:3000 .
# with npm
$ npm run start

# with yarn
$ yarn start
The start command will run webpack and Babel and get our app loaded.
Essentially what this command does is compile all of our React code including transpiling, checking for errors, compiling Sass, creating a JavaScript bundle of all our code, injecting this into the public/index.html file and finally loading it all up in our browser.
Build Scripts
Create React App comes with a few scripts that are helpful for our development. We will use these scripts whenever we want to:
- Run our application for development
- Build our application for production
- Test our application if we've created tests
You can see inside our package.json where the scripts are located:
We can run any of the above commands using the following:
# starting our app for development
$ npm start
$ npm run start
$ yarn start

# building our app for production
$ npm run production
$ yarn production

# testing our application
$ npm run test

# ejecting our application  (ONLY DO IF YOU KNOW WHAT YOU ARE DOING)
$ npm run eject
start: This command will start our application for development. It will even open up our application for development in browser at http://localhost:3000.
build: We can bundle our application for production and generate only a few files that we can host for our users.
test: This will run all of our tests like the one that comes with Create React App in App.test.js
eject: Ejecting will give you access to configure every aspect of your React application. This means that Create React App is no longer handling the configuration for your application. This command is only for those that are 100% sure they want to leave the comfort of CRA and need extra configuration.